Showing posts with label Recipe. Show all posts
Friday, December 21, 2018
Blogmas Series: Christmas Morning, Banana Bread
Several years ago, someone told me how their Mom would prepare all the food that they would eat on Christmas Day before Christmas, so that when Christmas came she would enjoy the holiday instead of being stuck in the kitchen all day. I thought that was an amazing idea!! Right away, I began to apply this idea in my own family.
When it comes to Christmas Day, I prepare everything in advance!! This way I am not running around like a chicken with my head cut off and missing out on quality time with my family. What this means is that, I make sure to wrap my Christmas presents early. Also, in the days leading up to Christmas, another huge undertaking for me is to prepare the majority of our Christmas meal.
I'm so happy to report, this change in our routine has been working well for me and my family.
As far as Christmas morning breakfast goes...
If I have been too busy to prepare in advance homemade cinnamon rolls or something else delicious for Christmas morning, then my go-to option for our Christmas breakfast is always something that I can put in my crockpot. Most years, I have made a breakfast casserole and put it in my crockpot the evening of Christmas Eve. Then I let it cook overnight, so it is ready for us to eat on Christmas morning.
I just love waking up to the smell of breakfast on Christmas morning!!
I am thankful that we started this tradition in our home especially, now that we live in Hong Kong and I don't have an oven in my kitchen. That being said, for Christmas morning my plan is to make make Banana Bread recipe (see below) and put it in the crockpot. Let it cook overnight, so that in the morning we have a delicious breakfast waiting for us.
When we first arrived in Hong Kong, I made this Banana Bread recipe in the crockpot and it worked!! I can't wait to make it again for my family.
Below, I have included my husband's favorite Better Homes and Garden Banana Bread recipe. Most of the time, for his sake I add chocolate chips as well. I try not to add too many, because I have one kiddo that doesn't like chocolate very much.
What does your family enjoy eating for breakfast on Christmas morning?
.....
Banana Bread
by, Better Homes and Garden
Ingredients
2 Cups all - purpose flour
1 1/2 tsp baking powder
1/2 tsp baking soda
1/4 tsp salt
1/4 tsp ground cinnamon
1/8 tsp nutmeg
2 eggs, beaten
5 mashed ripe bananas
1 Cup sugar
1/2 Cup oil or melted butter, or margarine
1 Cup chocolate chips (optional)
Instructions
- Preheat oven to 350 degrees F.
- Grease bottom and 1/2 inch up the sides of one 9x5x3-inch pan; set aside
- In large bowl combine flour, baking powder, baking soda, salt, cinnamon, and nutmeg
- Make a well in center of flour mixture; set aside
- In medium bowl combine eggs, banana, sugar, and oil
- Add egg mixture all at once to flour mixture
- Stir just until moistened (batter should be lumpy)
- Fold in chocolate chips
- Spoon batter into prepared pan
- Bake for 55 to 60 minutes or until a wooden toothpick inserted near center comes out clean
- (If necessary, cover loosely with foil the last 15 minutes of baking to prevent over browning)
- Cool in pan on a wire rack for 10 minutes
- Remove from pan
- Cool completely on rack
- Wrap, store overnight before slicing
Optional: Streusel-Nut Topping. In a small bowl combine 1/4 cup packed brown sugar and 3 tablespoons all-purpose flour. Using a pastry blender, cut in 2 tablespoons butter until mixture resembles coarse crumbs. Stir in 1/3 cup chopped walnuts.
Monday, December 10, 2018
Blogmas Series: Family Cookie Party
Back in 2005, Jon and I spent our first Christmas together in Haiti, visiting my best friend, Michelle, and her family. It was such a memorable Christmas. Over the holidays, Michelle’s Mom, Ms. Cindy, baked the most delicious food for us. To this day, our favorite sugar cookie recipe is the one that Ms. Cindy made for in Haiti. During our first Christmas, we had fun baking and decorating sugar cookies. I am happy to report, that almost 13 years later and our Christmas cookie tradition is still going strong.
Seriously, we take Ms. Cindy’s sugar cookie recipe with us wherever we go and share it with our loved ones during Christmas time. We have taken this recipe to Oregon, Texas, Washington, California, China, and now Hong Kong!!
In recent years, my side of the family tried to have a “Family Cookie Party” whenever we can get together for the holidays. Each year our family seems to add a few new members and my Mom currently has 17 grand babies, with two sets of TWINS. Back to our cookie party, it’s fun to bake sugar cookies and let the kids decorate their own cookies.
This tradition is far from perfect, because last year everyone who came to the family cookie party got sick. Oops!! Little did we know, my niece brought home and awful stomach bug, which would be passed on to most everyone in the family. Even my Mom got sick. It was fun to be with family, but hard when everyone is so sick.
| Family Cookie Party 2017 |
I am so thankful for the wonderful memories that we have made with our friends and family. I highly recommend that you consider hosting your own cookie decorating party this year. Below, I have included Ms. Cindy’s sugar cookie and basic icing recipes, so that you can enjoy these cookies as much as my family has each and every year.
.....
Sugar Cookies
By, Ms. Cindy
Ingredients
3/4 cup margarine
1 cup sugar
2 eggs
1 tsp vanilla
2 1/2 cups flour
1 tsp baking powder
1 tsp salt
Instructions
Mix all ingredients.
Cover and chill at least 1 hour.
Roll out onto floured surface.
Bake at 400 degrees for 6-8 minutes.
…..
Basic Icing (for Sugar Cookies)
By, Ms. Cindy
Ingredients
1/3 cup butter
3 cups powdered sugar
1 1/2 tsp vanilla
2 Tbsp milk
Instructions
Blend butter and sugar.
Stir in vanilla and milk.
Tuesday, December 4, 2018
Blogmas Series: Homemade Hot Chocolate
Would you like to know a random fact about me?
I do not like coffee.
I went to college in Portland, Oregon where everyone was crazy about coffee. I would get invited to go to Starbucks all the time. Honestly, I never knew what to order when I went out to Starbucks, because I didn't like coffee or hot drinks in general.
So, what was I supposed to order!?
As a result of this dilemma I decided that it would be worth it to acquire a taste for a few hot drinks. That way if someone invited me to Starbucks, I would have something to order other than water. Early on, my beverage of choice became hot apple cider. It was delicious and didn't have a hint of coffee in it/ Additionally, I have taught myself to enjoy hot chocolate and even some tea (which came in handy during my twin pregnancy).
I enjoy lots of different hot beverages now and I am so thankful I took the time to try new things. If I hadn't been willing to try something new, I never would have discovered some of my very favorites.
Today, I want to share a homemade hot chocolate recipe with you that my family enjoys every year. My friend makes homemade hot chocolate and it inspired me to try making this myself. I searched Pinterest for just the right recipe. Several years ago, I discovered this Homemade Hot Chocolate recipe from Anna Davis on the Kelly Moore blog. This recipe is delicious and I have been making it ever since.
Each year, I make a big batch and then keep some for us to enjoy! Then, I give the rest away to friends and family. I have even put the homemade hot chocolate in little bags and used this as stocking stuffers. It was a huge hit!!
I have included the recipe below.
.....
Homemade Hot Chocolate
By, Anna Davis
Ingredients
1 (28 oz) container of Nesquick
1 (11 oz) container of creamer
1 (25.6 oz) container powdered milk
2 1/2 cups of powdered sugar
1 to 1 1/2 packs small marshmallows
Instructions
Stir it up and you're ready for hot chocolate.
Put in fun containers and give as Christmas gifts.
Add 4-5 Tbsp to 8 oz of hot water then adjust to taste.
Enjoy!
Monday, November 19, 2018
Janet’s Chicken and Dressing
“I thank my God in all my remembrance of you,” - Philippians 1:3 ESV
It’s hard to believe that Thanksgiving is only a few days away!! After our big move and with Jon in training, our Thanksgiving plans are super low-key. However, this is a BIG Thanksgiving for us. It will be our first Thanksgiving in Hong Kong. It will also be the twins first Thanksgiving. That’s right, our first Thanksgiving as a family of 7!!
We’ve been doing lots of fun things in preparation for Thanksgiving. In our homeschool, we’ve done several Thanksgiving projects. We made a Thanksgiving banner, painted Thanksgiving pictures, and we’re working on thankful books soon Thanksgiving we can share what we are thankful for this year. I also found some Thanksgiving and fall books at the Hong Kong Library that we have been reading.
One of the biggest decisions that I have to make this year will be what we are going to have for our Thanksgiving meal. I’m always looking for delicious recipes to make over the holidays. I can't tell you how many hours I spend scrolling through Pinterest for the perfect recipe.
Are you looking for a delicious new recipe to try for Thanksgiving? Look no further!!
We lived in Texas for 11 years, in that time I was introduced to some of the most delicious food. One of my favorite dishes is chicken and dressing. However, I never learned how to make it before we left Texas. Don’t get me wrong, there are lots of other good foods that I learned how to make like corn casserole, BBQ ribs, canned peaches, homemade jam, chicken spaghetti, breakfast casserole, and more.
Just not chicken and dressing.
To my delight, my precious friend, Janet White made a YouTube video to share her amazing ‘Chicken and Dressing’ recipe with the world!! I’m so excited, because all I have to do is follow Janet’s step by step instructions and to know how to make your very own chicken and dressing at home.
Trust me this recipe will not disappoint!!
Thursday, September 24, 2015
Recipe Review: Pumpkin Spice Cupcakes
Happy Fall!! That's right, yesterday was the first official day of Fall. This is my favorite time of year. I love everything about fall, like chilly weather, crisp fall air, hot cocoa, the colors, sweaters, foggy mornings, apples, and more.
In honor of the first day of Autumn, I wanted to bake something delicious. While browsing through My Recipe Collection, I rediscovered my recipe for Pumpkin Spice Cupcakes. To be honest, I am not a huge fan of pumpkin flavored things and so I have only made these cupcakes once. However, I decided that I was going to make them anyway. To my surprise, I really enjoyed these cupcakes!! The pumpkin flavor was not too overwhelming and pairs well with the spice cake mix.
I hope you all will try this recipe, because it is so easy and delicious!! Even my girls enjoyed these cupcakes.
. . . . . . . . . .
Instructions
Mix everything together and put in muffin tins.
Bake at 350 degrees for 25 minutes
Additional Ideas:
In honor of the first day of Autumn, I wanted to bake something delicious. While browsing through My Recipe Collection, I rediscovered my recipe for Pumpkin Spice Cupcakes. To be honest, I am not a huge fan of pumpkin flavored things and so I have only made these cupcakes once. However, I decided that I was going to make them anyway. To my surprise, I really enjoyed these cupcakes!! The pumpkin flavor was not too overwhelming and pairs well with the spice cake mix.
I hope you all will try this recipe, because it is so easy and delicious!! Even my girls enjoyed these cupcakes.
| The ingredients |
| Combine cake mix, pumpkin, and water together in a mixing bowl. |
| Stir until combined. |
| Scoop batter into 24 cupcake liners. Bake at 350 degrees for 25 minutes. |
| Remove cupcakes from oven and place on a cooling rack. |
| These are called cupcakes, but they almost have the texture of a muffin. Either way they are delicious. |
. . . . . . . . . .
Pumpkin Spice Cupcakes
Source: Living a Changed Life
______________________________
Servings: 24
Serving Size: 1 cupcake
Calories: 84.2
Fat: 0.8 g
Fiber: 0.3 g
Protein: 0.6 g
Old Points: 2 pts
Points+: 2 pts+
______________________________
Ingredients
1 box spice cake mix
1 15 oz can of pure pumpkin (not pie filling)
1/2 cup water
1 15 oz can of pure pumpkin (not pie filling)
1/2 cup water
Instructions
Mix everything together and put in muffin tins.
Bake at 350 degrees for 25 minutes
Additional Ideas:
Use a butter pecan cake mix instead of spice cake.
1 Box yellow cake mix, 1 can pumpkin, Spices (nutmeg, cinnamon, ground cloves), Baked it in a 9 x 13 pan.
Monday, September 14, 2015
Blog Anniversary
Six years ago, I created my weight loss blog, Living a Changed Life. In the beginning, I created this website, for anyone who wanted to know about my weight loss story.
It started out being about my weight loss journey and slowly grew. You do not have to spend much time on my blog before you find recipes, helpful tips, encouragement, honesty, low pointsplus food finds, and more!!
Thanks to Pinterest, my most popular recipe and blog post has been Recipe Review: Berry Cobbler. It is such a quick and easy recipe, which is what makes it one of my very favorites! If you haven't tried this Weight Watchers friendly recipe, you should.
My blog has seen a lot of changes over the years, but so have I! In the past six years, reached my weight loss goal, earned Lifetime status with Weight Watchers, become a Weight Watchers leader, run a half marathon, carried and gave birth to 2 almost 3 babies, and the list could go on and on. There have been both ups and downs, but I am here to say that the Lord has been more faithful to me than I could have ever imagined!
One of the hardest things for me, since becoming a Mommy, I have not felt like I have much to say about anything. Hence my lack of regular blogging. However, God is showing me that Living a Changed Life, is not just about my weight loss, but about all the changes that I might go through in different seasons of my life.
I am so thankful for the Lord's blessing over my blog. I cannot wait to see what this blog will look like in another six years.
| Berry Cobbler Ingredients |
Thanks to Pinterest, my most popular recipe and blog post has been Recipe Review: Berry Cobbler. It is such a quick and easy recipe, which is what makes it one of my very favorites! If you haven't tried this Weight Watchers friendly recipe, you should.
My blog has seen a lot of changes over the years, but so have I! In the past six years, reached my weight loss goal, earned Lifetime status with Weight Watchers, become a Weight Watchers leader, run a half marathon, carried and gave birth to 2 almost 3 babies, and the list could go on and on. There have been both ups and downs, but I am here to say that the Lord has been more faithful to me than I could have ever imagined!
One of the hardest things for me, since becoming a Mommy, I have not felt like I have much to say about anything. Hence my lack of regular blogging. However, God is showing me that Living a Changed Life, is not just about my weight loss, but about all the changes that I might go through in different seasons of my life.
I am so thankful for the Lord's blessing over my blog. I cannot wait to see what this blog will look like in another six years.
Monday, June 2, 2014
Is It Worth It - Power Point Presentation
Back in April, I was one of the guest speakers at a local Weight Watchers event called, "Is It Worth It?". At the event I talked about how to transform your favorite family recipes into more Weight Watchers friendly choices. After all, that is what I do with my Recipe Reviews, here at Living a Changed Life. Let's go through the process together as I share some of my powerpoint slides with you.
First, you find a recipe that you like. It might be a family recipe or a recipe that you found on Pinterest. Either way, it is probably a recipe that isn't Weight Watchers friendly yet.
Next, I open up my Weight Watchers Recipe Builder in eTools, because this really is my secret weapon! I evaluate the original recipe, taking on item at a time. For Example: The recipe might call for whole milk, but you could substitute fat free milk instead.
Also, play around with the portion sizes, because more portions equal less pointsplus per serving.
While you are in Recipe Builder, don't forget to use the "Lighten It Up" tab. Weight Watchers gives you lots of great ideas about other ways to lighten up your recipes. For Example: Instead of using butter, you could use applesauce.
As you can see in the slide above, the original recipes was 6 pointsplus per serving. However, after it was transformed, it was only 4 pointsplus per serving!
Ultimately you must ask yourself, "Is it worth it for you to take the time to transform some of your favorite recipes?"
Monday, February 17, 2014
Recipe Review: Crockpot Beef Stroganoff
While on maternity leave, I had the opportunity to fly home to visit my family for two whole weeks!! I spent most of my time with my youngest sister, Vivian. Olivia, Sophie, and I stayed at Vivian's house along with her husband and two children. The entire time we were there everyone was waiting for the arrival of Vivian's third baby, Elias. Waiting for baby Eli to be born gave us all a lot of time hangout. One of our favorite past times was cooking and baking anything and everything.
During our time together, I came to learn that my sister is an amazing cook. She does not need a recipe, because she can come up with dinner on the fly based on what is in her pantry. I wish I was that talented.
Crockpot Beef Stroganoff is an easy and delicious recipe that my sister came up with on the fly. Thankfully, Vivian let me write down her recipe and modify it, to make it a little more Weight Watchers friendly. As you will see below, I also changed this recipe and made it in my Crockpot instead of on the stove top.
I hope you all enjoy Vivian's recipe as much as I do!!
. . . . . . . . . .
During our time together, I came to learn that my sister is an amazing cook. She does not need a recipe, because she can come up with dinner on the fly based on what is in her pantry. I wish I was that talented.
Crockpot Beef Stroganoff is an easy and delicious recipe that my sister came up with on the fly. Thankfully, Vivian let me write down her recipe and modify it, to make it a little more Weight Watchers friendly. As you will see below, I also changed this recipe and made it in my Crockpot instead of on the stove top.
I hope you all enjoy Vivian's recipe as much as I do!!
![]() |
| The ingredents |
![]() |
| In your Crockpot mix together your soup, sour cream, milk, salt, black pepper, italian seasoning, and garlic powder. |
![]() |
| Brown lean ground beef and add it to your sauce. |
![]() |
| Add dry noodles to your crockpot mixture and stir. |
![]() |
| Cook on high for 1 - 1 1/2 hours. Becareful to not let the noodles overcook! |
![]() |
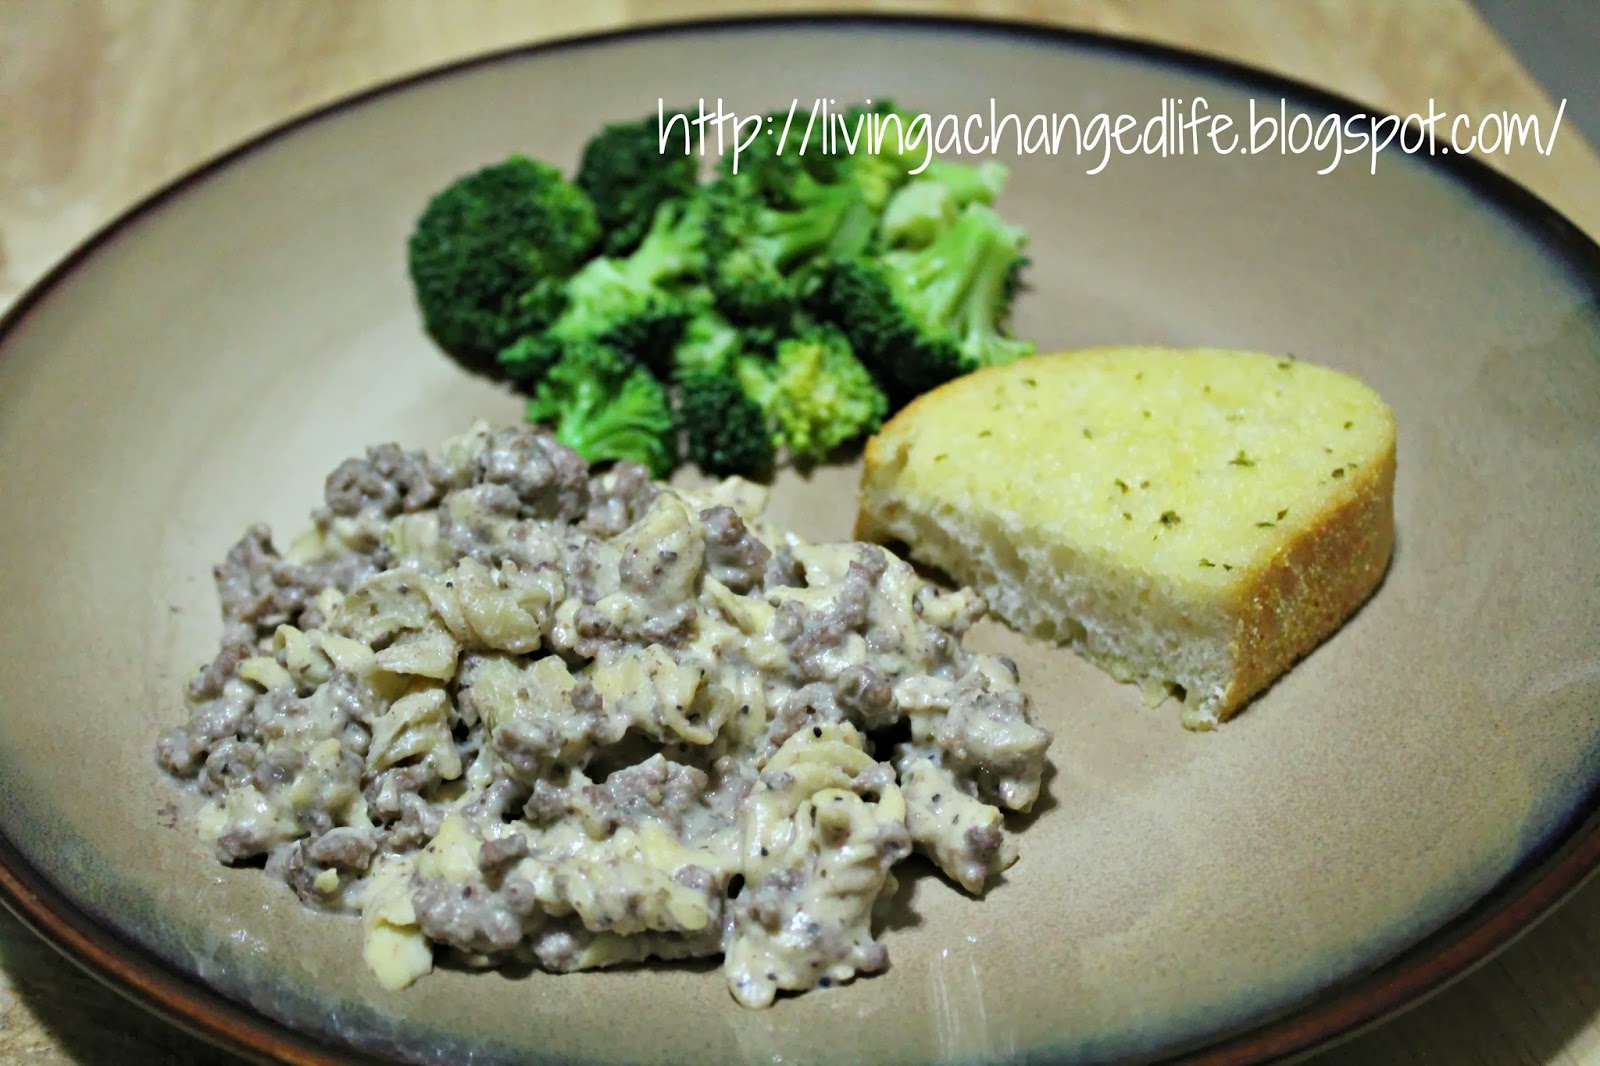
| I served this on Valentine's Day with steamed broccoli and garlic bread. |
. . . . . . . . . .
Crockpot Beef Stroganoff
Source: Vivian Eccleston
______________________________
Servings: 8
Serving Size: 3/4 cup
Calories: 323
Fat: 7.0 g
Fiber: 4.6 g
Protein: 20.6 g
Old Points: 6 pt
Points+: 8 pts+ (only 5 pts+ for 1/2 cup)
______________________________
Ingredients
1 pound lean ground beef
1 box (12 ounces) smart taste rotini pasta
2 cans (21 ounces) 98% fat free cream of mushroom soup
1/2 cup fat free sour cream
1/2 cup fat free milk (add more as necessary)
1 tsp salt
1 tsp black pepper
1 tsp italian seasoning
1 tsp garlic powder
Instructions
Brown ground beef.
In your Crockpot mix together your soup, sour cream, milk, salt, black pepper, and garlic powder. Once sauce is thoroughly mixed together, add cooked ground beef and dry pasta.
Cook on high for 1 - 1 1/2 hours. Stirring every 1/2 hour, so everything mixes together. Becareful not to let the noodles overcook!
*Please note the original recipe called for you to make this dish in one pot on the stove top. However, I do not have a pot big enough to make this entire dish in one pot! So, I modified the instructions so that this recipe could be made in my Crockpot.
Instructions
Brown ground beef.
In your Crockpot mix together your soup, sour cream, milk, salt, black pepper, and garlic powder. Once sauce is thoroughly mixed together, add cooked ground beef and dry pasta.
Cook on high for 1 - 1 1/2 hours. Stirring every 1/2 hour, so everything mixes together. Becareful not to let the noodles overcook!
*Please note the original recipe called for you to make this dish in one pot on the stove top. However, I do not have a pot big enough to make this entire dish in one pot! So, I modified the instructions so that this recipe could be made in my Crockpot.
Tuesday, March 19, 2013
Recipe Review: Healthy Cookies
I enjoy eating bananas, but they always get too ripe before I am ready to eat them! Thanks to the tin foil solution, I haven't had that problem much any more. However, I still have a bunch of bananas in the freezer that I need to use. My husband prefers that I make Chocolate Chip Banana Bread, but recently I have been looking for a healthier ways to use those ripe bananas.
When I found these Healthy Cookies on Pinterest I thought that they were too good to be true. I was excited, because they did not have many ingredients and were low in pointsplus values.
I'm excited to share this new recipe review with you and hope that you enjoy it!
When I found these Healthy Cookies on Pinterest I thought that they were too good to be true. I was excited, because they did not have many ingredients and were low in pointsplus values.
I'm excited to share this new recipe review with you and hope that you enjoy it!
| Ingredients: bananas, quick oats, and walnuts |
| Crush, mash, and mix all the ingredients together. |
| Place a tablespoon of each on cookie sheet. |
| The finished product! |
. . . . . . . . . .
Healthy Cookies
Source: The Burlap Bag and Skinny Taste
______________________________
Servings:8
Serving Size: 2 cookies
Calories: 93
Fat: 3.5 g
Fiber: 2 g
Protein: 2 g
Old Points: 2 pt
Points+: 2 pts+
______________________________
Ingredients
2 medium ripe bananas, mashed
1 cup uncooked quick oats
1/4 cup crushed walnuts
Instructions
Instructions
Preheat oven to 350°F. Spray a non-stick cookie sheet with cooking spray.
Combine the mashed bananas and oats in a bowl. Fold in the walnuts and place a tablespoon of each on the cookie sheet.
Bake 15 minutes. Makes 16 cookies.
*If you don't like nuts, add in chocolate chips or coconut instead. Just make sure you adjust the pointsplus values.
Wednesday, January 9, 2013
Recipe Review: Crockpot Baked Potatoes
I am always on the look out for good crockpot recipes. So naturally, when I came across this recipe on Pinterest I could not resist making it into my own recipe review to share with all of you. The biggest thing that you will need to watch out for is underestimating the size of your potato!
Cook on low for 8 hours or on high for 4.
![]() |
| You're main ingredients are potatoes and aluminum foil. |
![]() |
| I used my Weight Watchers scale to weigh my raw potato to find out how many pointsplus it would be for dinner. |
![]() |
| After weighing my potato, I covered it with aluminum foil and wrote my name on it. Otherwise, I would not have known which baked potato was mine! |
![]() |
| My favorite baked potato topping are these Green Giant Just for One Broccoli & Cheese Sauce trays. They are just 1 pointsplus per tray! |
![]() |
| This is what my Baked Potato looked like when it was finished! It tasted just as good as the baked potatoes that I cook in the oven! |
. . . . . . . . . .
Crockpot Baked Potatoes
Source: Budget Savy Diva
______________________________
Servings: 4
Serving Size: 1 potato
Calories:164
Fat: 0.2 g
Fiber: 4.7 g
Protein: 4.3 g
Old Points: 2 pt
Points+: 4 pts+ (large is 5 pts+)
______________________________
Ingredients
4 medium russet potatoes
aluminum foil
Toppings (extra pts+): light sour cream, fresh chives, bacon bits, broccoli, cheese
Instructions
Instructions
Wash and scrub potatoes until clean. Dry thoroughly. When dry, prick potatoes with a fork and wrap in aluminum foil.
Cook on low for 8 hours or on high for 4.
Friday, December 7, 2012
Recipe Review: Potato Lover's Soup with Crispy Bacon
I have not posted a recipe review since BEFORE Olivia was born. I
have missed writing these posts so much!! I cannot promise that I will
post a recipe review every week, but I will try not to let so much time
go by in between now and my next post.
As you know Weight Watchers 360° launched this week. In honor of this special occasion, I wanted to try a recipe from my newest Weight Watchers cookbook, "What to Eat Now". This cookbook comes in the Ultimate Weight Watchers 360° kit, that we talked about yesterday.
This new cookbook has 150 recipes, meal ideas, and more for your first 12 weeks on plan. I really like this, because so many people ask me what they should eat now that they are on Weight Watchers and this book helps to get your weight loss journey off to a good start!
As you know Weight Watchers 360° launched this week. In honor of this special occasion, I wanted to try a recipe from my newest Weight Watchers cookbook, "What to Eat Now". This cookbook comes in the Ultimate Weight Watchers 360° kit, that we talked about yesterday.
This new cookbook has 150 recipes, meal ideas, and more for your first 12 weeks on plan. I really like this, because so many people ask me what they should eat now that they are on Weight Watchers and this book helps to get your weight loss journey off to a good start!
![]() |
| The Ingredients |
| Instead of using three small potatoes, I weighed out 24 ounces of potatoes. |
| First, I cooked the turkey bacon. |
| Next, I cooked the green onions and garlic. |
| Then I added all the other ingredients except the potatoes. |
| I added my soup mixture to the Crock Pot with the potatoes and let it cook all day. |
| This is the final product! It was so good! |
. . . . . . . . . .
Potato Lover's Soup with Crispy Bacon
Source: What to Eat Now By, Weight Watchers
______________________________
Servings: 4
Serving Size: 1 1/2 cup
Calories: 215
Fat: 4 g
Fiber: 5 g
Protein: 10 g
Old Points: 4 pt
Points+: 5 pts+
______________________________
Ingredients
3 large (8 ounce) baked russet potatoes
3 strips bacon
3 garlic cloves, minced
4 scallions, thinly sliced
2 3/4 cup reduced sodium chicken broth
1/4 teaspoon salt
1/4 teaspoon hot pepper sauce
3/4 cup fat free half and half
Instructions
1. Leaving skin on, coarsely chop potatoes; set aside
2.
Cook bacon in large nonstick saucepan over medium heat until crisp.
Drain on paper towels and set aside. Pour off and discard all but 1
teaspoon of drippings.
3.
Add garlic and half of scallions to drippings in saucepan. Cook over
medium heat, stirring occasionally, until softened, about 3 minutes. Add
broth, salt, pepper sauce, and potatoes, mashing potatoes with wooden
spoon to break them up slightly. Bring mixture to boil. Reduce heat and
simmer until heated through. 2-3 minutes
4. Stir in half and half and return to simmer. Serve soup sprinkled with crumbled bacon and remaining scallions.
*For your information
This
soup is especially convenient if you have leftover baked potatoes on
hand. If you don't, preheat the oven to 425°F, pierce each potato a few
times with a fork, and place on the middle rack of the oven. Bake until
tender, 45 to 50 minutes.
Thursday, August 30, 2012
Recipe Review: "Labor Inducing" Gingersnap Cookies
A while back I was asking my friends to give me some good ideas about how to induce my labor. One of my friends, Meagan, suggested that I try making these "Labor Inducing" Gingersnap Cookies. I found the recipe on Pinterest. I decided to put this recipe into the Weight Watchers recipe builder to see how many points+ per cookies. To my suprise these are only 1 points+ per cookie!
Even though these cookies did not induce my labor, I am glad that I found a great new low points+ treat!
![]() |
| The Ingredients |
![]() |
| Combine flour, baking soda, cinnamon, ginger, cloves, salt and cayenne pepper in small mixing bowl. Set dry ingredients aside. |
![]() |
| Then blend margarine in large mixing bowl. Stir in brown sugar and granulated sugar slowly. |
![]() |
| Add the molasses, then the egg whites. Finally, add the dry ingredients to your mix. |
![]() |
| Roll dough into ¾ inch balls. Roll cookie balls in sugar to lightly coat each cookie. Place balls on cookie sheet lined with parchment paper. |
![]() |
| Bake in oven for 8-10 minutes or until cookies are golden brown. |
![]() |
| The final product! |
![]() |
| Just 1 points+ per cookie! |
. . . . . . . . . .
Labor Inducing Gingersnap Cookies
Source: Just Mommies
______________________________
Servings: 60 cookies
Serving Size: 1 cookie
Calories: 66
Fat: 1.6 g
Fiber: 0.2 g
Protein: 0.7 g
Old Points: 1 pt
Points+: 1 pts+
______________________________
Ingredients
2 1/2 cups all-purpose flour
1 1/2 teaspoons baking soda
3/4 teaspoon cinnamon
1 teaspoon ground ginger
1/2 teaspoon ground cloves
1/2 teaspoon salt
1/2 teaspoon cayenne pepper
8 tablespoons (or 1 stick) margarine
1/2 cup granulated sugar (will also need extra sugar to roll cookie dough in)
1 cup light brown sugar, packed
1/3 cup molasses
2 egg whites
Instructions
Preheat oven to 350 degrees.
Combine flour, baking soda, cinnamon, ginger, cloves, salt and cayenne pepper in small mixing bowl. Set dry ingredients aside.
Then blend margarine in large mixing bowl. Stir in brown sugar and granulated sugar slowly. Add the molasses, then the egg whites. Finally, add the dry ingredients to your mix.
Roll dough into ¾ inch balls. Roll cookie balls in sugar to lightly coat each cookie. Place balls on cookie sheet lined with parchment paper. Bake in oven for 8-10 minutes or until cookies are golden brown.
Subscribe to:
Posts (Atom)


.jpg)
.jpg)
.jpg)
.jpg)
.jpg)
.jpg)
.jpg)
.jpg)
.jpg)
.jpg)
.jpg)


